Native American Bead & Quillwork Lesson Ideas
Scroll down to find a variety of multicultural art lesson ideas using birchbark. Each lesson incorporates Native American Culture by tribe and region, elements and principles of art, cross-curricular suggestions and materials.
Click HERE to access my TPT account for additional complete lessons, rubrics and resources.
Click HERE to access my TPT account for additional complete lessons, rubrics and resources.
Native American Art: "Porcupine Quillwork" Ideas
5th-8th grades
Porcupine Legend

Legend Resource: https://www.historymuseum.ca/cmc/exhibitions/aborig/fp/fpz2f24e.html
Title/Technique: Porcupine Gets Her Quills
Tribe (s): Ojibwe Region: Woodland/Plains
Cross curricular connections: Reading, Lang Arts, History
Grade(s): 2+
Elements/Principles of art: Texture
Materials: Birch Bark scraps, tooth pics, markers, use link above for Ojibwe legend or click here to view Quillworker, a Cheyenne legend
Quillwork: Porcupine quillwork is an art form unique to Native American tribes. Before the arrival of Europeans it was one of the most utilized methods to decorate. For 100s of years it was used to decorate boxes, moccasins, shirts, dresses, leggings and jewelry. It is easily recognized. The abundance of porcupines allowed harvesting the quills through out the woodlands and the west. Often the porcupine was harvested for food and the quills. Today quills can be harvested in ways that do not harm to the porcupine. One method involves tossing a blanket over the porcupine, when it runs away the quills stick in the blanket! This sounds easier than it is. They move quickly therefore simply tossing a blanket on their back is no easy task! Plant and mineral dyes were used to create colors. Most modern quill workers use RIT or another commercial dye. Quillwork is a considered by some to be sacred, it takes time, skill and patience. There are several techniques using stitching and stringing.
The arrival of beads with settlers, quillwork became less common. However, modern artists are keeping the tradition alive! There is renewed interest exploring this traditional art form. Many artists harvest their own quills, you can also buy materials online!
I used a paper mache box with my students to introduce the use of quills. We dyed them with commercial dyes. Because the tips are barbed, like a fish hook, I do not recommend using them with young students or without supervision!
Birch Bark Ideas
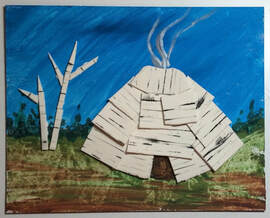
Birch trees are one of most beautiful trees in the woodland forest. The stark white bark stands out from the green foliage surrounding it! This tree bark was carefully harvested in the spring. The methods used ensured that the tree would not be harmed and would continue to provide this valuable resource! The harvested bark was used to build homes, store items, make baskets and other utilitarian items. There are medicinal uses for the bark and sap as well. Have your students explore the many uses of birchbark, making art of course is my favorite activity!
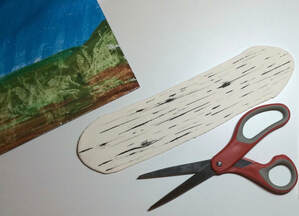
How to Make faux Birch Bark
|
Learn an easy method to create faux Birch Bark using simple materials! The results are realistic! Use your imagination to create a models of a wigwam, canoes, baskets; or create your own design!
CLICK HERE for lesson plan. |
|
|
Birch Bark Horse, Honoring Native American Horse Nations
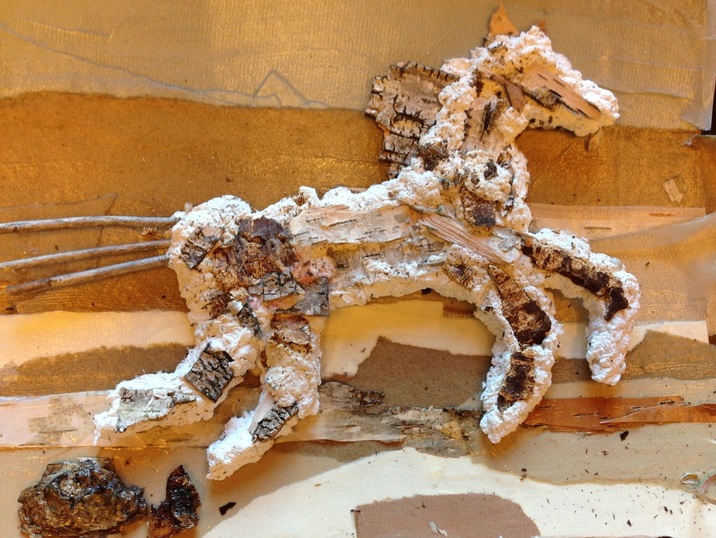
Relief sculpture/collage using birchbark, assorted papers and modge-podge.
Create background with cardboard, torn papers and modge-podge.
Horse is a paper pulp with birch bark and sticks embedded. Horse was created on wax paper, when dry it was hot glued onto background.
Create background with cardboard, torn papers and modge-podge.
Horse is a paper pulp with birch bark and sticks embedded. Horse was created on wax paper, when dry it was hot glued onto background.
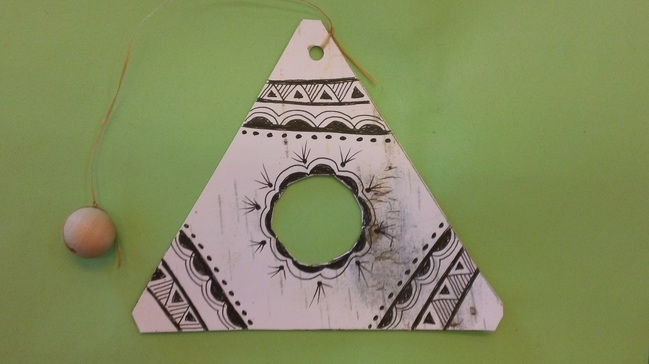
Ball and Triangle Game:
We used a color copier to copy an actual piece of birchbark, then added a layer of cardboard behind for extra strength. Cutting the hole required and exacto knife. We used a wooden bead and artificial sinew to keep it natural looking. See this web site for more information about this Penobscot game. http://www.nativetech.org
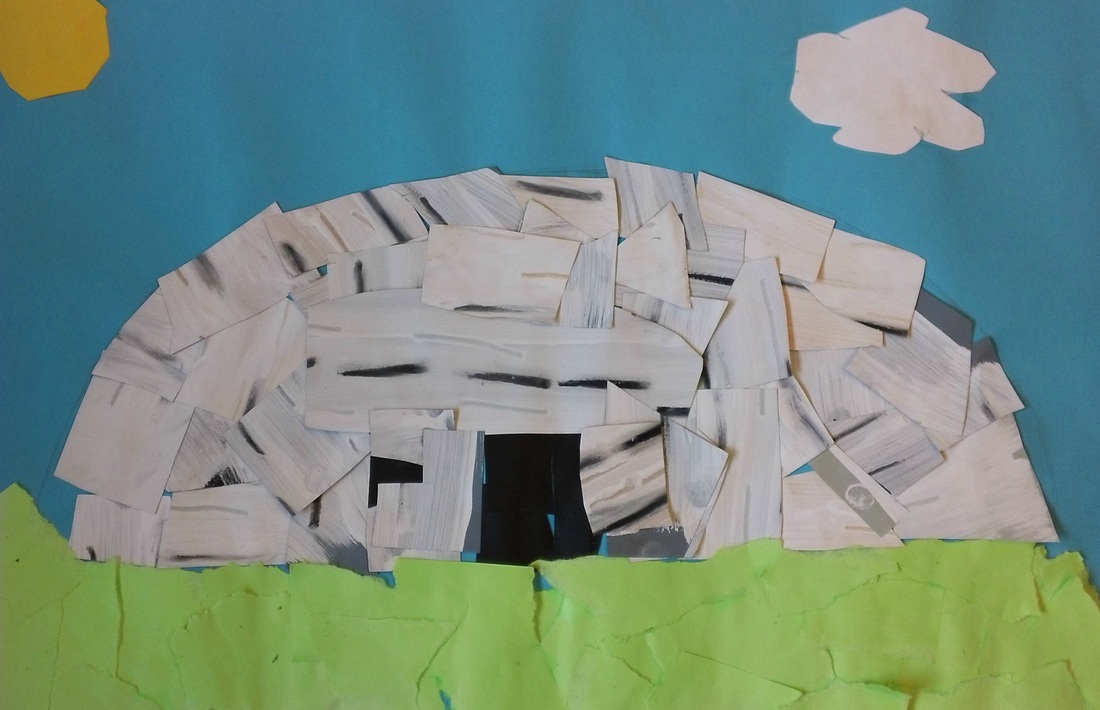
Native American Art: "How to Make Imitation Birchbark" Lesson
Title/Technique: How to make Imitation Birch Bark
This lesson was created to enrich a read aloud story in my school. The homeroom teacher was reading “The Birch Bark House” by Louise Erdrich to his 4th grade class. The story is a culturally accurate portrayal of life on Madeline Island. Madeline Island is located in Lake Superior and is a traditional home for the Ojibwe people. It is not necessary to read the story, I share it with you because it is one of my favorite children’s books and I highly recommend sharing with your students!
Tribe (s): Ojibwe Region: Woodland
Cross curricular connections: Lang. Arts, Science
Grade(s): 4-5
Elements/Principles of art: Visual Texture
Materials Needed:
Heavy brown craft paper, white tempera, big brushes, black colored pencil or oil pastel
Description:
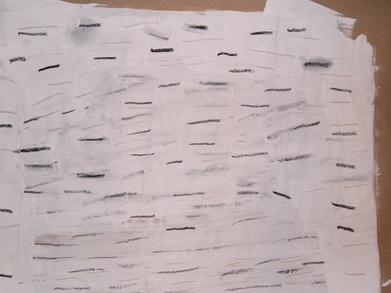
- Dilute the tempera to create a wash. Using a large brush wash over the brown paper in broad horizontal strokes. It is fine to be uneven or blotchy. Take a look at a real tree and you will see the variations. While the paint is still wet, use the end of your paint brush to scratch horizontal lines into the faux birch bark. When the paint is dry you can also add horizontal lines with a black pencil or oil pastel. Use your finger to smooth and blend the oil pastel for great results!
- When the paper is dry you can cut out variety of items to create a poster showing the uses of Birch Bark.
- Now that you know how to make the birchbark, you can use it to make a variety of items. See the other lesson ideas on how to make a Makak basket, a Canoe and a Wigwam!
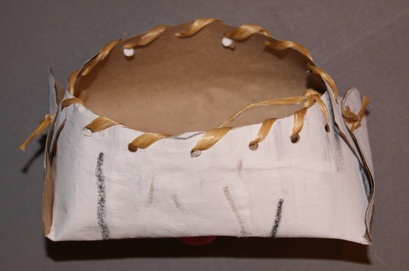
Native American Art: "Birch Bark Basket" Lesson Plan
Tribe (s): Multi Tribal use Region: Throughout the US
Cross curricular connections: Science, Social Studies
Grade(s): 4-5
Elements/Principles of art: Texture
Materials Needed:
See lesson on How to Make Birch Bark
Basket template
Sinew, yarn or string
Plastic needles (optional)
Small hole punch
Lesson Description:
Cross curricular connections: Science, Social Studies
Grade(s): 4-5
Elements/Principles of art: Texture
Materials Needed:
See lesson on How to Make Birch Bark
Basket template
Sinew, yarn or string
Plastic needles (optional)
Small hole punch
Lesson Description:
- Brown craft paper or paper bags are painted with a watered down white wash of tempera paint
- When dry, use black crayons or black pencils to create short dashed lines; same direction, vary the lengths
- For the Basket, I like to double the weight of the brown craft paper by gluing 2 layers together before painting the faux finish.
- Let it dry overnight
- Once paper is made students can use if for a variety of projects.
- To make the basket I have my students trace the template on the back of their birch bark and cut it out.
- The ends are gently folded to overlap. You can staple it (easiest) or use the hole bunch to punch thru all 3 folded layers. You will need 2 holes to stitch. See photos. I like to use artificial sinew to stitch. It does not require a needle and is fairly stiff. You can also use yarn or string and a needle.
- When the ends are secure, use the hole punch and punch holes ½ inch all the way around the top. Use sinew, yarn or string to whip stitch around the top to give it a finished look.
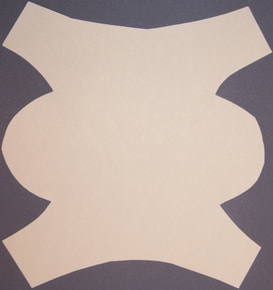 Basket template
Modify as needed for your materials. It can be any size. I suggest trying several to see what will work for your students! Cut out patterns using the folded heart method!
Native American Art: "Menominee Legend: Origin of Fire and the Canoe" Lesson
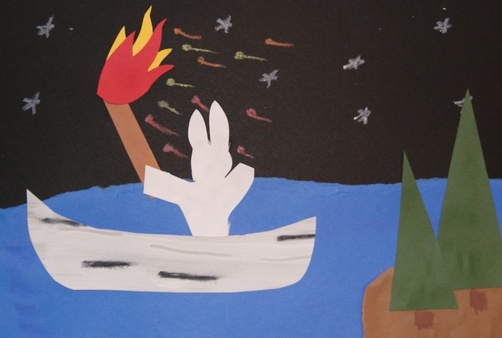
Title/Technique: Birchbark Collage
This is a fun lesson that uses collage to illustrate a scene from the Menominee Legend. I like to emphasize how important artist/illustrators are to create a great book! My students become the Illustrators creating an illustration of Manabush and his adventure.
Tribe (s): Menominee Region: Woodland
Cross curricular connections: Lang. Arts
Grade(s): 2-4
Elements/Principles of art: Space: Background, middle ground, foreground
Materials:
See lesson How to Make Birch Bark
Menominee Legend: click here
Scissors
Glue
12 x 18 black or dark gray paper for the background
Assorted Construction Papers
Description:
Day 1
Read the Legend
Discuss the story and brainstorm the images
What is the most important image that comes to mind?
Your job is to create an illustration of Manabush in the canoe stealing fire!
*each student make a 6 x 12 Birch Bark paper, see lesson on making birchbark*
Day 2
Use the Birch Bark paper and create a canoe
Use assorted papers to create Manabush stealing fire in the canoe
What is in the background? middle ground? foreground?
Arrange all images before gluing down.
When your composition is complete glue it down.
Demo how to glue to prevent over use!
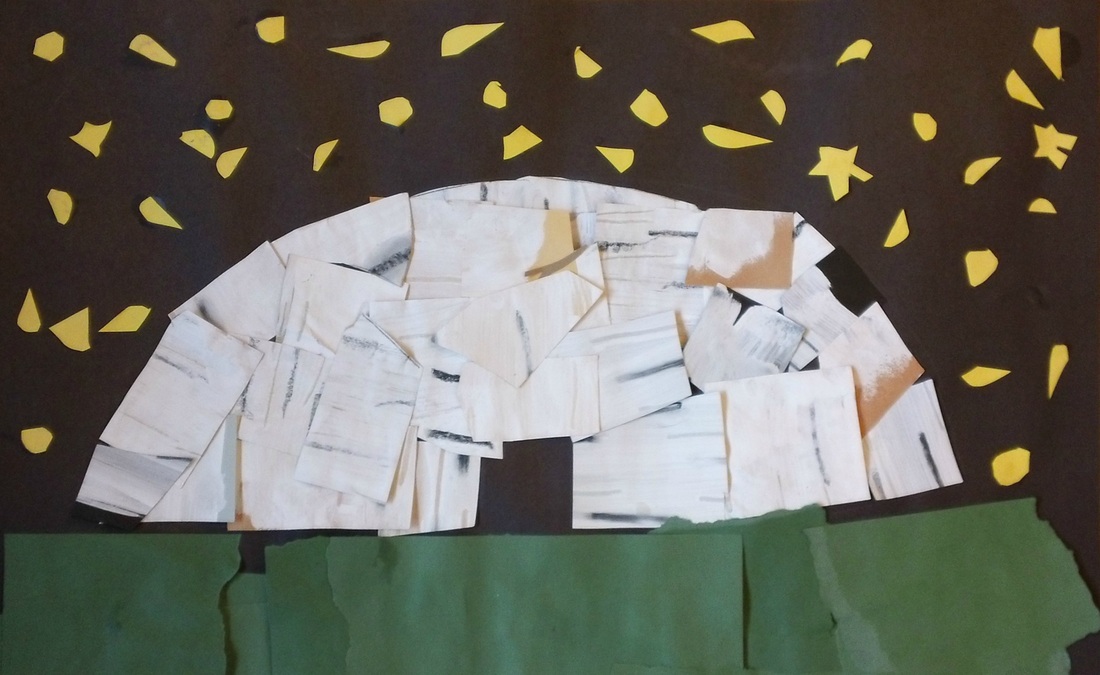
Birchbark Wigman at Night
Copyright Restrictions and the NativeAmericanActivities Web Site:
Be aware that all text and images on the Native American Activities website are Copyright Protected.
You must obtain written permission to reproduce or transmit any NativeAmericanActivities materials.
Teachers may print-out text and images without restriction for use in a non-internet classroom setting.
The following statement should be included on each copy:
Copyright © 2023 Native American Projects & Lessons Plans. Internet URL: http://www.nativeamericanactivities.com